


 United States


 Best Seller
 All Printers
 All PDAs
 All Tablets
 All Thermal Labels
 Printer Accessories
Welcome to the wonderful world of quilting sewing! Whether you're a beginner just starting out or an enthusiast looking to enhance your skills, this guide will help you understand the basics and equip you with the knowledge you need to create beautiful quilts. Let's dive in!
What is Quilting Sewing?
Quilting sewing is all about stitching layers of fabric together to make a quilt. Basically, you sew different pieces of fabric into one complete design, which can be simple or very detailed and colorful. Usually, a quilt has three parts: the top fabric (called the quilt top), a middle layer for warmth (called batting or wadding), and a fabric backing.

It can be as easy as piecing together basic squares (patchwork) or as challenging as creating complex designs that tell a story. Simply put, it's a creative way to blend different fabrics and patterns into something unique and beautiful.
10 Must-Have Tools for Quilting
Getting started with quilting requires some basic tools. Here's a list of ten essential items you'll need:
- Sewing Machine
- Fabric
- Scissors
- Pins
- Tape Measure
- Quilting Ruler
- Fabric or Chalk Markers
- Glue
- Rotary Cutter

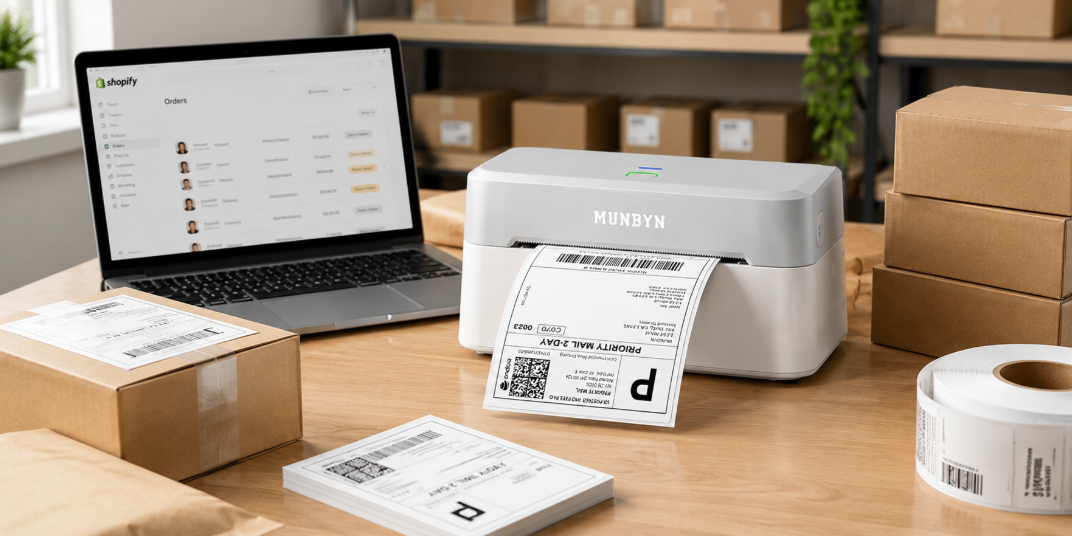
- Thermal Printer and Paper
A thermal printer allows you to create or download sewing pattern templates and print them out.
At the same time, compared to traditional typing paper, A4 thermal paper is better for sewing fabric pieces. Here's why:
Ease of Use: For newcomers and enthusiasts alike, owning a portable A4 thermal printer is a smart choice. It's compact, lightweight, and user-friendly.
Thinner Paper: Thermal paper is much thinner than typing paper, making it easier to rip off the sewing parts and see through to check if the fabric covers the pattern area.
Convenience: You can fold and check the sewing lines conveniently anytime during your project.

Thermal printers are generally easy to set up and operate. They connect to your computer or smartphone via USB or Bluetooth, allowing you to print patterns directly from digital files. In addition, the thin thermal paper not only simplifies the sewing process but also reduces bulk and clutter in your workspace.
Steps to Make a Quilt
Now that you have your tools ready, let's go through the steps of making a quilt:
Step 1 Prepare the Digital Sewing Guide
First, find or create a digital sewing pattern. Many websites offer free or paid quilting patterns that you can download. These patterns provide detailed instructions and diagrams to guide you through the quilting process. Choose a pattern that matches your skill level and design preferences.

Step 2 Print the sewing guide onto the thermal paper from your portable thermal printer
Print the sewing guide onto the thermal paper. The printed guide will serve as your template for cutting and sewing the fabric. Carefully review the printed guide to ensure all lines and markings are visible. This will help you follow the pattern accurately during the sewing process.

Step 3 Sewing the Guide Paper with Fabric
To sew the guide paper with fabric, here are a few steps to follow.
1. Check if the fabric cover the sewing area
Lay your fabric over the printed guide and ensure it covers the entire sewing area. Align the fabric edges with the pattern lines to achieve proper placement.

2. Fix the sewing area with a pin
Use pins to secure the fabric to the guide paper. This will keep everything in place while you sew. Place the pins along the edges and corners to prevent shifting.

3. Fold the sewing areas on the paper
Fold the fabric along the sewing lines. Since thermal paper is very thin, you can see through the lines easily and fold them precisely. This step helps create crisp and accurate seams.

4. Cut off excess fabric
Trim any excess fabric around the edges to ensure clean lines and reduce bulk. Use sharp scissors or a rotary cutter for precise cutting.

5. Add the second sewing fabric piece
Place the second piece of fabric on top of the first one before sewing. Continue to add subsequent pieces following the same method before printing. Align the edges carefully to maintain consistency.

6. Sewing quilting pattern
Sew along the lines of the pattern, making sure to follow the guide carefully. Use a consistent stitch length and backstitch at the beginning and end to secure the seams.

7. Organize the fabric
Turn over the sewing paper and organize the patterned fabric to make it flat. Use your hands or a stone roller to smooth it out. Avoid using a steam iron or heated tool until you've finished sewing, as the thermal paper may react to heat. Once all pieces are sewn together, you can press the seams with an iron on a low setting.

Fast Forward: After completing the first piece of fabric, repeat 4 to 7 guidelines above until you've sewn all the pieces. This iterative process helps build your quilt top piece by piece.
Step 5 Trim & rip off the paper
Once your quilt top is complete, trim the edges and gently rip off the thermal paper along the lines. Because thermal paper is thinner, it's easier to remove than typing paper. Take care to avoid pulling on the stitches while removing the paper.

Step 6 Assemble different quilting pieces
Finally, assemble the quilt pieces together. Lay them out in the desired order and sew them together to complete your quilt. Make sure the seams align properly for a polished finish. Once assembled, you can add the batting and backing layers, then quilt and bind the edges.

Do's & Don'ts for Quilting Sewing Newbies
Here are some tips to help beginners avoid common mistakes and achieve the best results:
Do's:
- Pre-wash Your Fabric: This prevents shrinking and color bleeding later. Washing the fabric beforehand ensures that your quilt maintains its shape and color after subsequent washes.
- Practice Consistent Stitching: Keep your stitches even and consistent for a professional look. Practice on scrap fabric to get a feel for your sewing machine's settings.
- Plan Your Design: Take time to plan your quilt design before starting. Sketch it out or use software to visualize the final product. This helps you stay organized and focused throughout the project.
- Take Your Time: Quilting is a meticulous process. Don't rush through it; take your time to get everything right. Enjoy the journey and appreciate the details.
- Join a Community: Join quilting groups or online forums for support and inspiration from fellow quilters. Sharing experiences and tips can greatly enhance your quilting skills.
Don'ts:
- Don't Skip the Pressing: Press your seams as you go to keep everything flat and neat. Pressing helps set the stitches and creates a smooth, professional finish.
- Avoid Cheap Tools: Invest in quality tools. Cheap tools can lead to frustration and poor results. High-quality tools last longer and improve your quilting experience.
- Don't Ignore Safety: Be careful when using sharp tools like rotary cutters and scissors. Always cut away from your body and store tools safely when not in use.
- Avoid Overstretching Fabric: Handle fabric gently to avoid distorting or stretching it out of shape. Treat your fabric with care to maintain its integrity.
Ending Words
Quilting sewing is a rewarding and enjoyable hobby that allows you to create beautiful, functional art. With the right tools and guidance, anyone can master the basics and move on to more complex designs. Remember to be patient, take your time, and enjoy the process.

Share:
How Much Does a Tattoo Cost and How to Save on It?
How to Pack for a Move: Supplies, Packing List, and Tips