


 United States


 Best Seller
 All Printers
 All PDAs
 All Tablets
 All Thermal Labels
 Printer Accessories
As the new school year approaches, preparing your child for the adventure ahead can be exciting...and essential. Let's face it, no matter how careful your kids are, there's always a chance that they will lose their water bottle or lunch box at school. In this post, we'll explore how to create personalized labels for your kid's school supplies, so you will be ready for the back-to-school season!
Gather Your Supplies
Before diving into the creative process, ensure you have all the necessary materials on hand. Here's what you'll need:
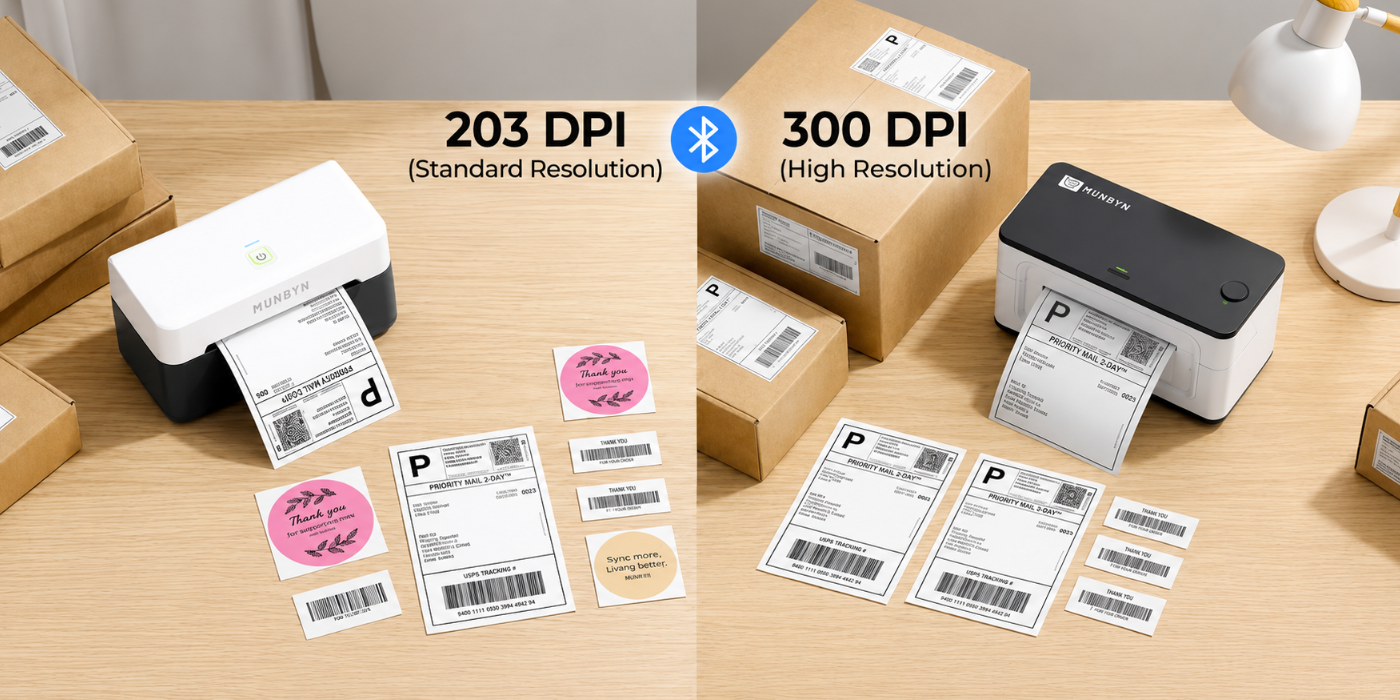
Thermal Printer: This nifty device is going to be your new best friend in the world of personalized labels. It's a portable and affordable label printer without any toner or ink needed.
Sticker Labels: Choose thermal stickers that are compatible with your thermal label printer and have a smooth surface, so the ink adheres beautifully. Also, it's BPA-free, so it won't cause any harm to our health. The best part, this kind of label is also water-proof and oil-proof, so it stays smooth even when your kid spills juice on it.
Munbyn Print App: This app is a breeze to use and allows you to design and print your labels. Simply download it onto your smartphone or tablet, connect it to your thermal label printer, and start designing. There's a variety of fonts and designs to choose from.
Design the labels
Now comes the fun part—designing the labels! Let your imagination run wild and involve your child in the creative process. Here are some ideas for personalized labels:
Name Labels: Create labels with your child's name to stick on notebooks, pencil cases, lunch boxes, and water bottles. Choose vibrant colors and fun fonts to make them eye-catching.
Subject Labels: Design labels specific to different subjects, making it easier for your child to organize their materials. For instance, you can have labels for math, science, art, and more.
Icon Labels: Include your child's favorite symbols or icons like animals, stars, or sports-related images. These can be used to personalize bags, textbooks, and even sports gear.
Here are the steps of designing the labels using a thermal label printer:
Step 1: Connect your phone or tablet to your printer, for this post, I use a 941B Bluetooth thermal printer


Step 2: Choose the label size and shapes.

Step 3: Design your creative labels using text, icons, border, etc


Print and Stick
Once your designs are ready, it's time to print the labels using the thermal label printer. Follow the printer's instructions for loading the sticker labels correctly. Choose the number of labels, density, and print rate. Now, it’s ready to print. Carefully peel off the backing of the sticker labels and stick them onto your child's school supplies. Smooth out any air bubbles or wrinkles for a clean look.


Share the Fun
Encourage your child to show off their newly personalized school supplies to their friends. You can also host a label-making party with other moms and their kids, fostering creativity and bonding among the children.
Personalizing school supplies with a thermal label printer and sticker labels is an enjoyable and practical way to prepare your child for the upcoming school year. Not only will these unique labels help your child identify their belongings easily, but they'll also add a touch of joy to their daily routine. So, gather your supplies, unleash your creativity, and make this back-to-school season unforgettable for your little one!
You may also like:
Tips to Organize Your Classroom Library Using Printable Sticker Labels
How to print round stickers in Word
Share:
Tips to Organize Your Classroom Library Using Printable Sticker Labels
How to Make Return Address Labels in Google Docs (Step-by-step)