How to Print DIY stickers at Home (A Step-by-step Guide)

If there could be one easiest way to decorate your living space, stickers would definitely be your best option! Mark my words here, if you are a home person, stickers are going to brighten your life just like a beam of morning sunlight that shines through the window. Paste cute stickers to the wall, make-up box, or a favorite book, you name it!
If you are looking for an answer to how to DIY stickers at home, this article would provide all the information you need. Without further ado, let’s jump into the following three easy steps.
Step 1: Paper selection
Label paper
These are the simplest and cheapest forms of stickers. Labels are also suitable for personalizing name tags, making photo stickers, and many other ideas. Don't know what paper to buy? You can choose between pre-cut and non-cut. If you don't have a rigid requirement on the length of the label, you can choose non-cut.
Waterproof and oilproof stickers
Concerned about labels that won't hold up well? Not a problem. MUNBYN label stickers are waterproof and oilproof, which allows them to stick longer than normal ones. What’s more, these labels have different colors for different printing purposes. You could choose the size based on the application area. For example, 4x6 labels are better for larger surfaces, while 2-inch round labels are good for smaller items or packaging.
Step 2: Printer selection
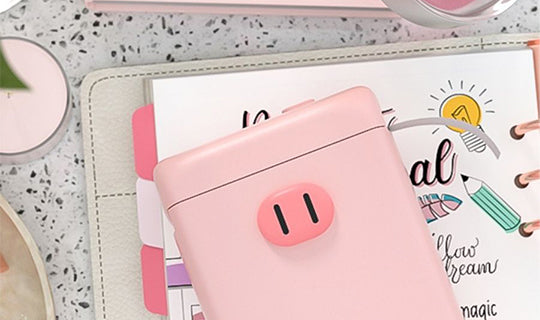
If you only want to print small labels, what you need should be small, convenient, easy to use, and allows a variety of label papers, pre-cut and non-cut. Believe me, if it is connected wirelessly, it'll save a huge amount of your time. I believe that my next recommendation will be liked by girls because the bear appearance of this printer is really cute. Let's take a look at the MUNBYN bear label printer, which supports Bluetooth printing.It is as big as your mobile phone and only weighs 160g, which makes it super easy to carry with. The most important thing is that you can also get 3 rolls of cute label paper.
If you need to print larger waterproof stickers, you can prepare your favorite patterns on your computer in advance, connect a printer, and start printing. At this time, you can choose color printing or black and white printing according to your needs.
If it is black and white printing, then you might as well choose the MUNBYN monochrome thermal printer, which can not only save the cost of buying toner but also has the advantages of small size, fast printing, and simple use. With MUNBYN thermal labels, you will be able to customize your own stickers.
Step 3: How to print
#Bear label machine
- Download Munbyn Print App
- Turn on the Bluetooth and connect to it
- Put in the label roll
- Type in the text
- Print your final label
#Sticker Printing
- Install your printer
- Connect it to your computer
- Put in the sticker
- Select the pattern
- Print out your stickers
MUNBYN, your home assistant for a high-quality lifestyle. Simple, convenient and fast is your expectation, and it is also our pursuit.


